Boeing 737 Cockpit
Content:
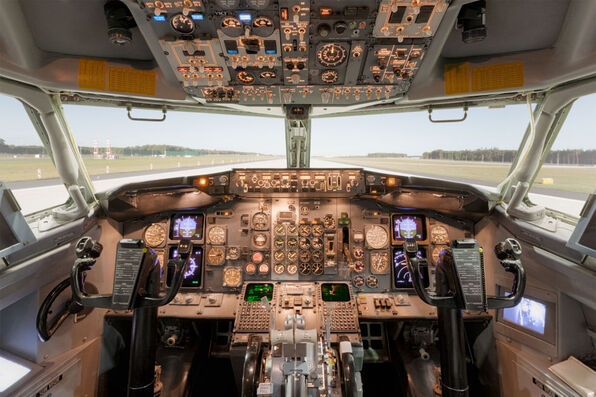
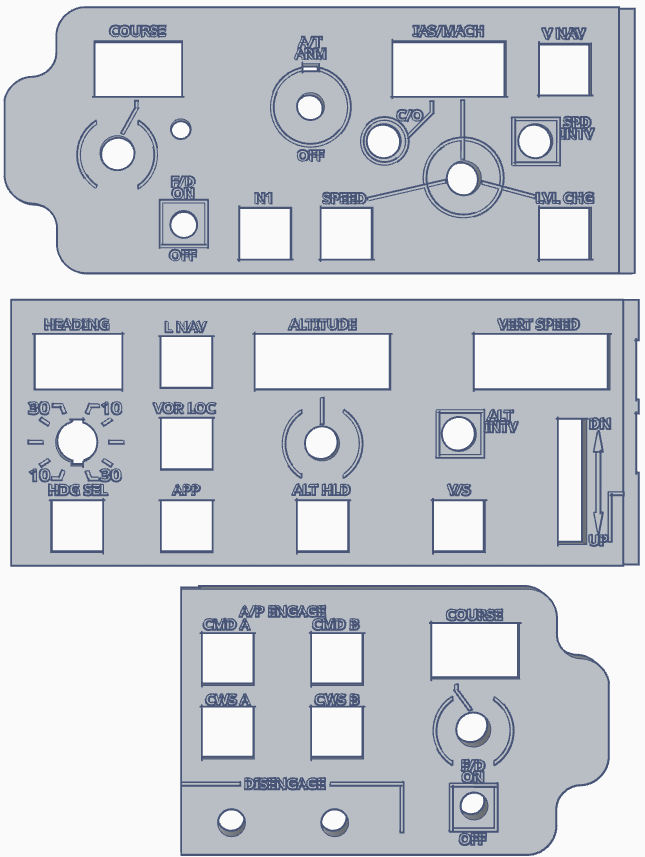
MIP

Fig.1 MIP
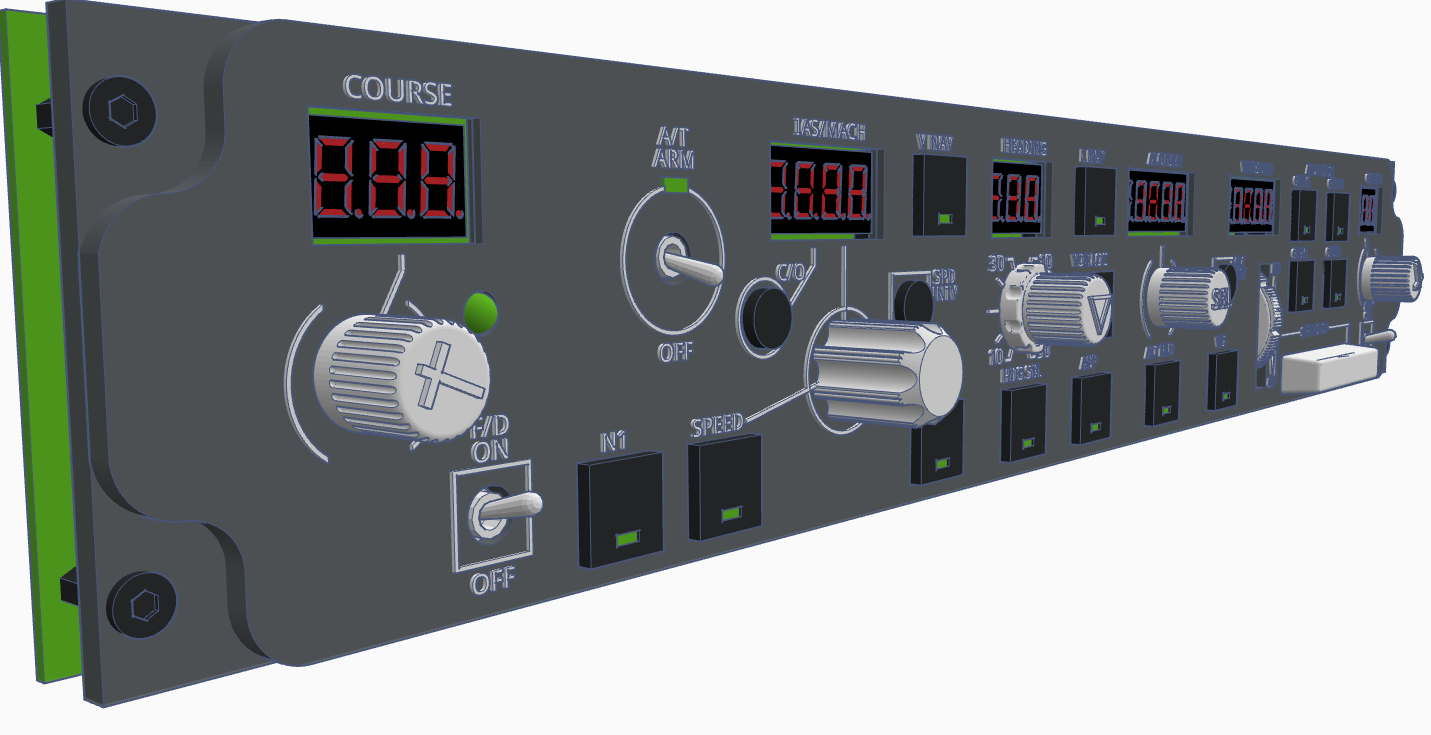
MCP
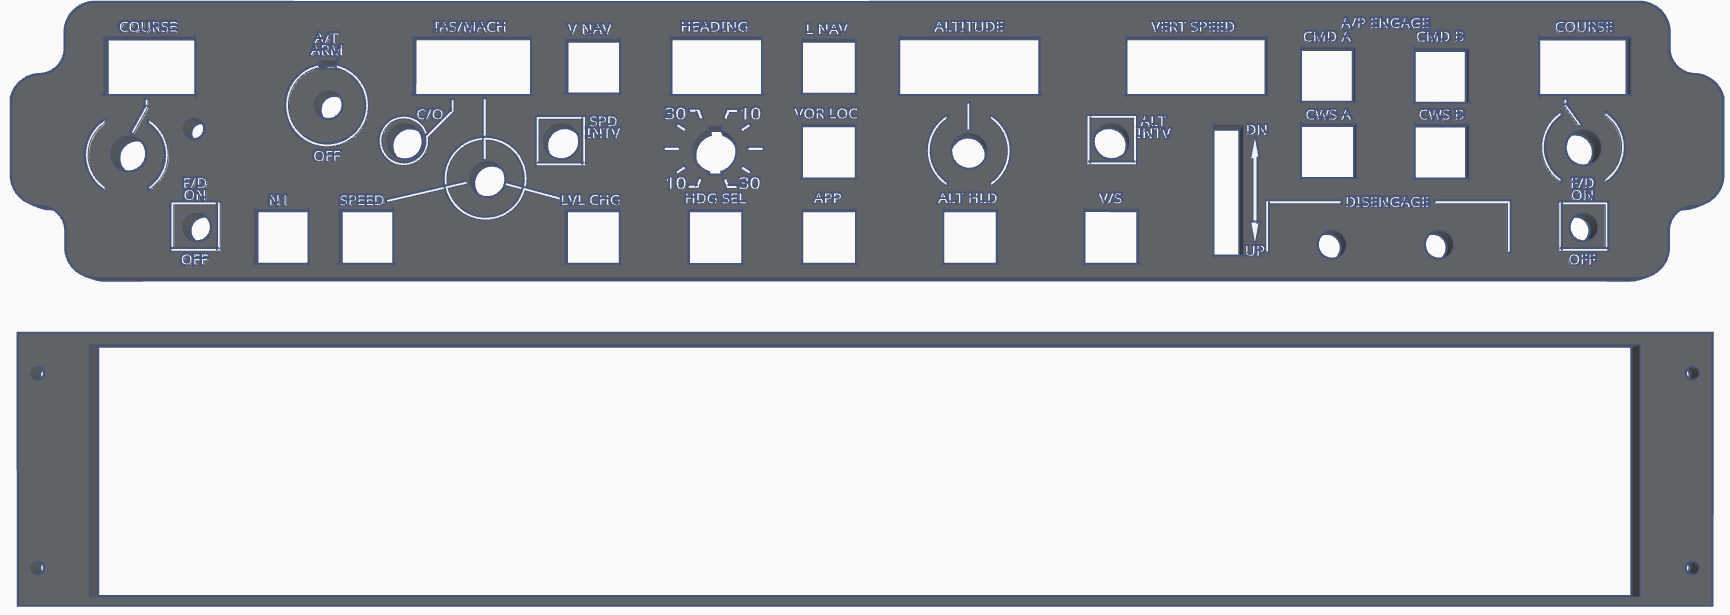
Faceplate
There are two versions:
* with text
* without text
To print the faceplate with text, you will need a 0.2mm nozzle otherwise you won't be able to get the text. If you are going with the text version, you need to paint the text with white marker.
I will try to CNC the faceplate on alucobond and see the results, If it comes out good, I will print the text on a sticker, which should glue great on aluminum.
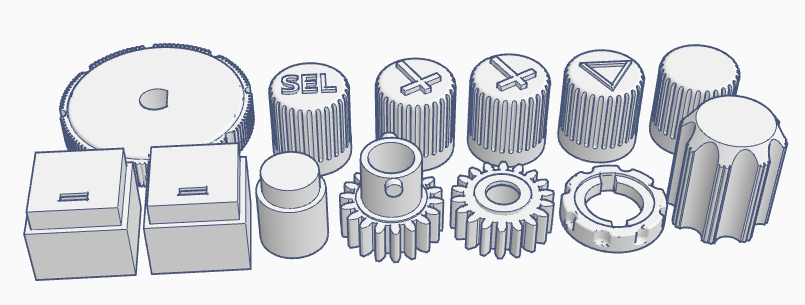
You need:
* 12 pcs of SquareButtonA (which is the normal square push button)
* 1 pcs of SquareButton (which is the VOR LOC push button with a piece cut off to not cause issues with the pinion of the banking knob)
There are two versions:
* with text
* without text
To print the faceplate with text, you will need a 0.2mm nozzle otherwise you won't be able to get the text. If you are going with the text version, you need to paint the text with white marker.
I will try to CNC the faceplate on alucobond and see the results, If it comes out good, I will print the text on a sticker, which should glue great on aluminum.
You need:
* 12 pcs of SquareButtonA (which is the normal square push button)
* 1 pcs of SquareButton (which is the VOR LOC push button with a piece cut off to not cause issues with the pinion of the banking knob)

|

|

|
|
|
|
Version 1.4
* Added two 74HC595 shift registers (all led's are handled through shift registers and supplied with external power).
* Replaced Heading double rotary encoder with normal encoder. Added a hole to mount a 5 position switch for the Heading range.
* Organized resistors in groups based on their values (to mount easier).
* Organized Max7219 resistors and caps in groups.


MCP
Version 1.3
* Added push buttons to the CRS, SPD, HDG, VS Knobs.
* Added push buttons to the CRS, SPD, HDG, VS Knobs.

Fig. 2 MCP V1.3 Front

Fig 3. MCP V1.3 Layout
|
|
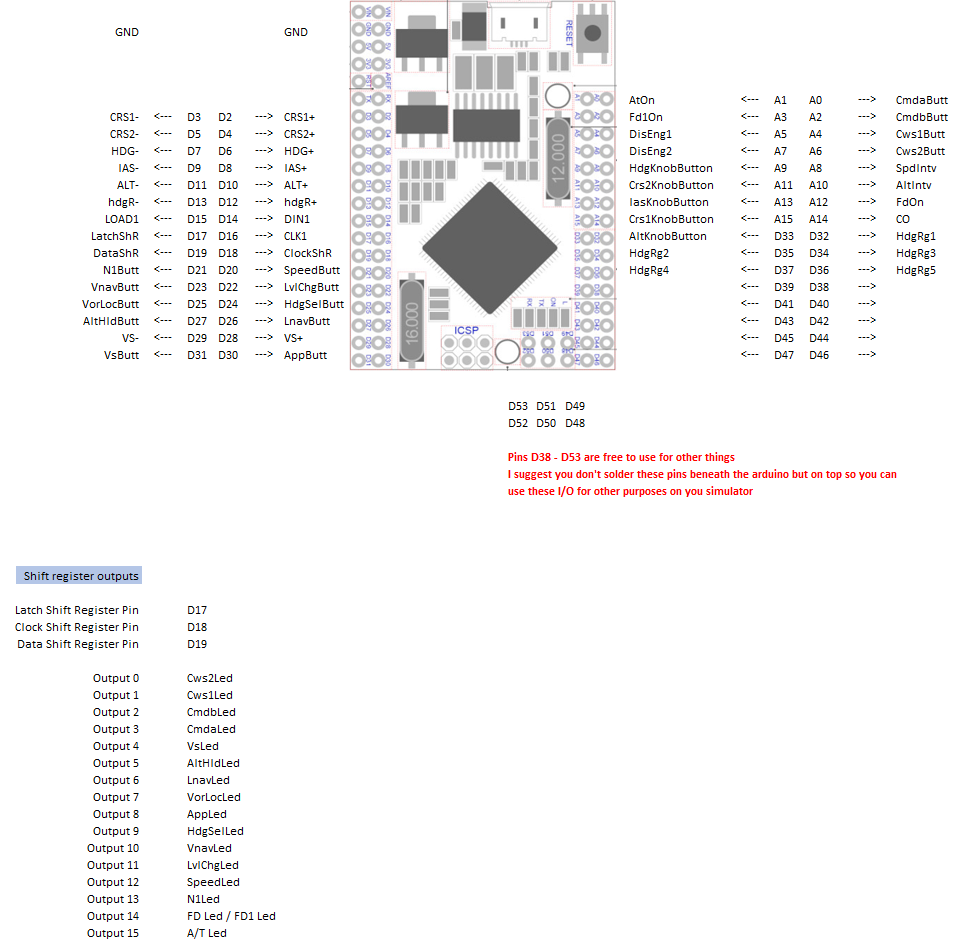
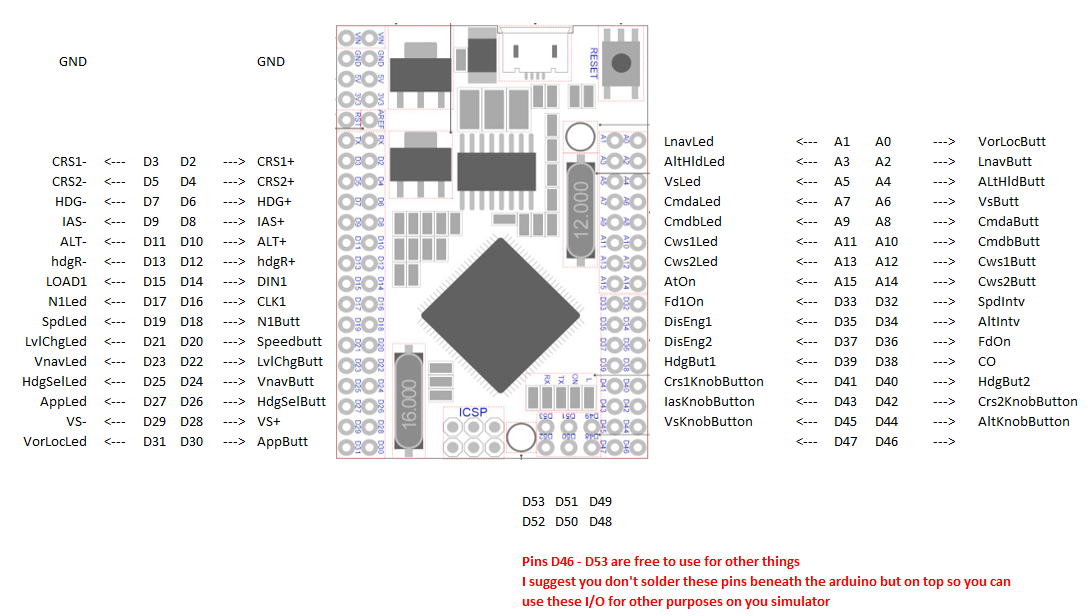
Fig.4 MCP V1.3 Pinouts
Version 1.2
* Replaced 3 digit IAS/MACH display with 4 digits
* Replaced DIY Heading/Heading Range encoder with EC11EBB24C03 Dual Encoder
* Added attachable Arduino Mega Pro 2560 to the back of the MCP, this way you only need two cables to run the MCP: usb
cable and 5V power cable.
* Replaced 3 digit IAS/MACH display with 4 digits
* Replaced DIY Heading/Heading Range encoder with EC11EBB24C03 Dual Encoder
* Added attachable Arduino Mega Pro 2560 to the back of the MCP, this way you only need two cables to run the MCP: usb
cable and 5V power cable.

Fig. 5 Front side of the MCP PCB
|

Fig. 6 Back side of the MCP PCB
|

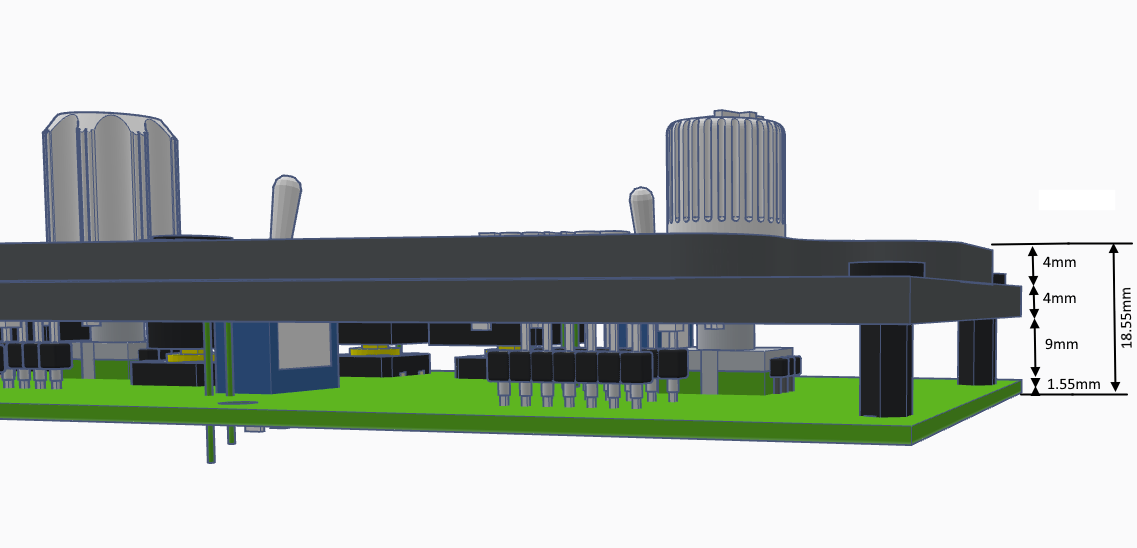
Fig. 7 PCB Layout
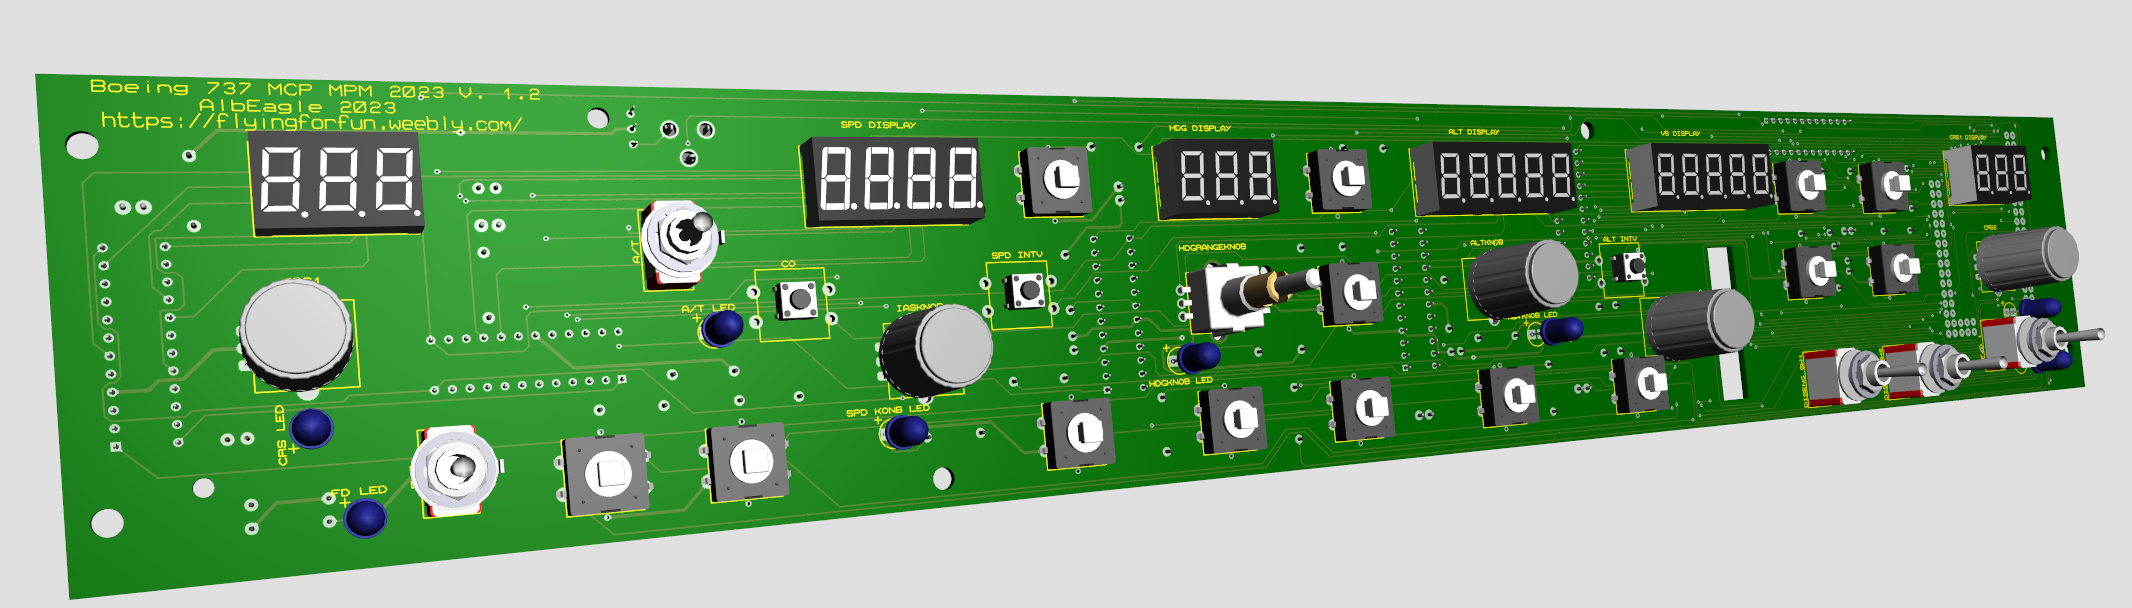
Fig. 8 Front side of the MCP PCB populated with elements
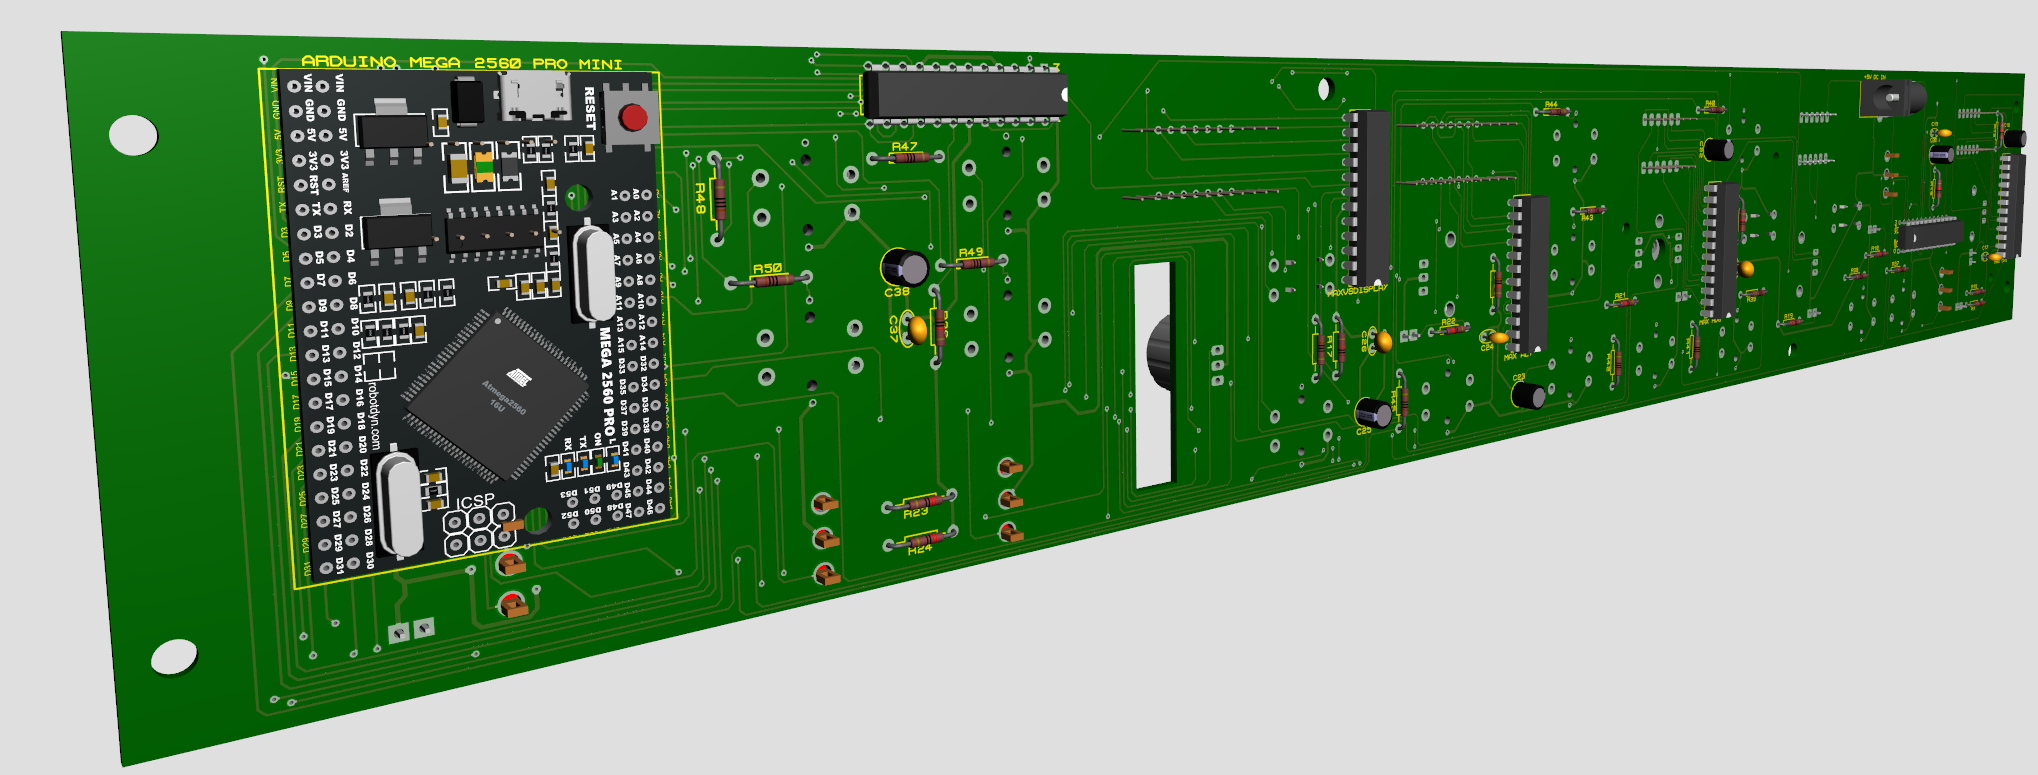
Fig. 9 Back side of the MCP PCB populated with elements
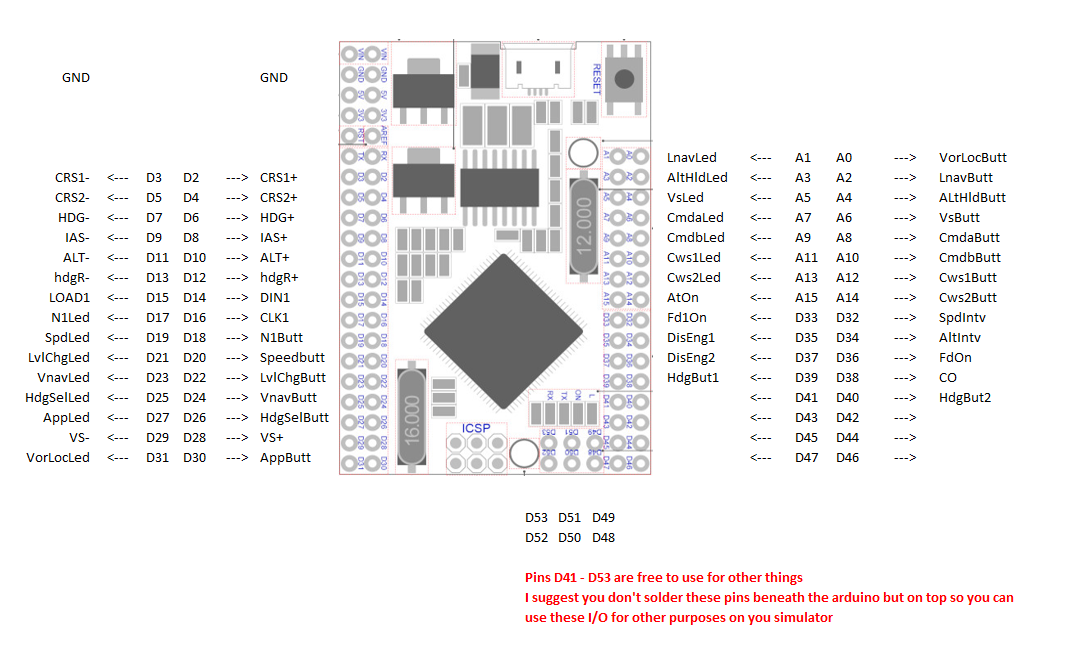
Fig. 10 MCP V1.2 Pinouts
Version 1.1

Fig. 11 Front side of the MCP PCB
|

Fig. 12 Back side of the MCP PCB
|

Fig. 13 Front side of the MCP PCB populated with elements
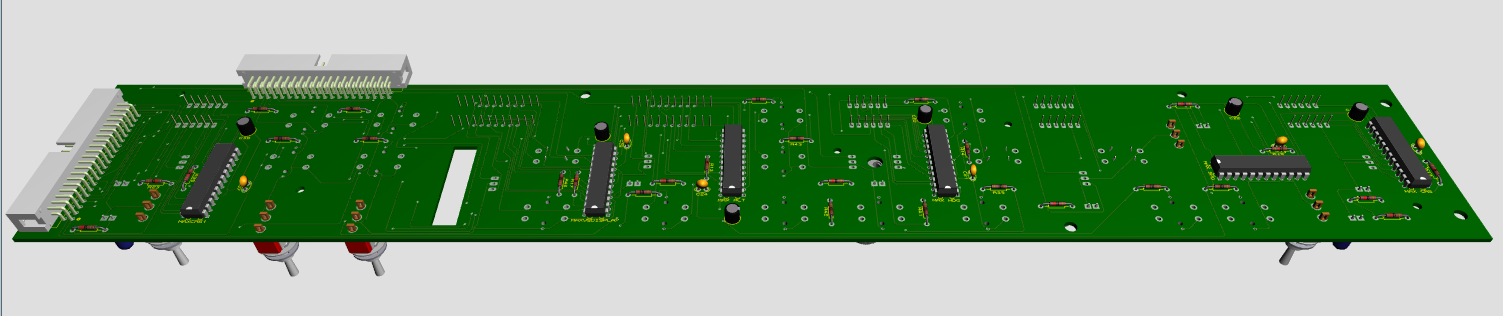
Fig. 14 Back side of the MCP PCB populated with elements
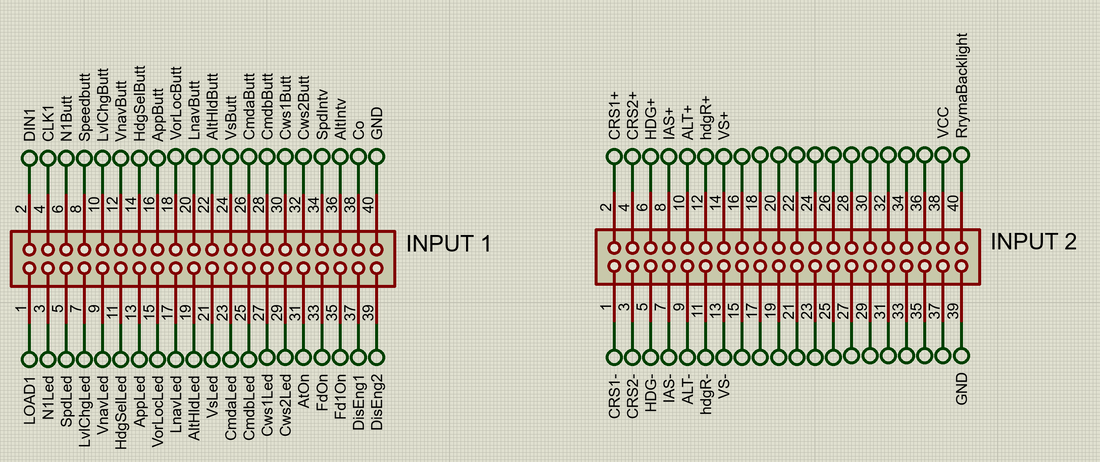
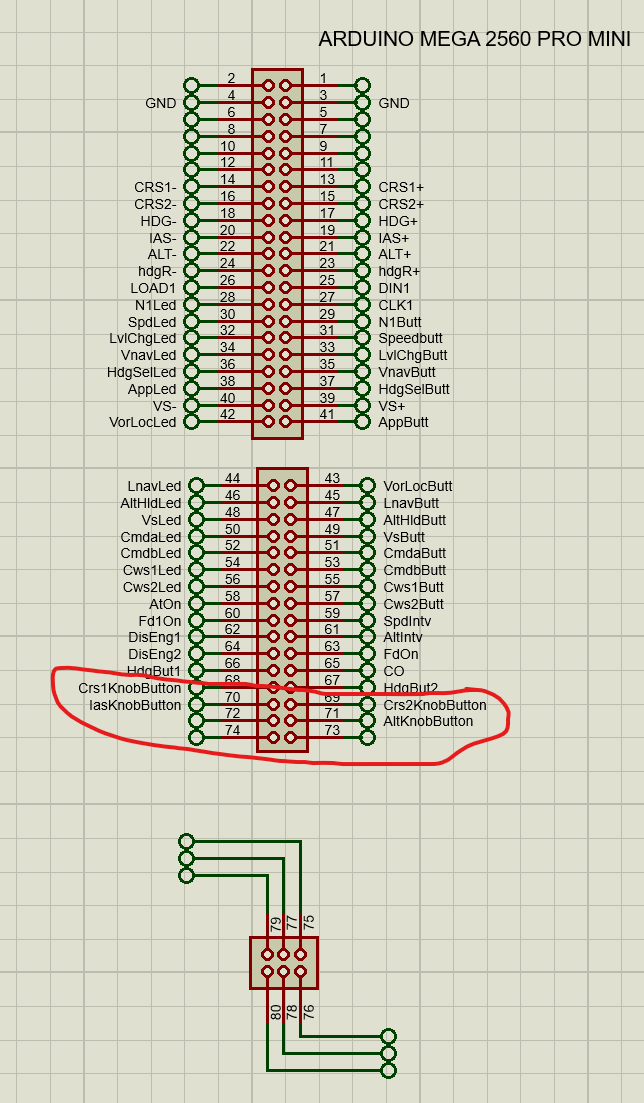
Fig. 15 MCP V1.1 Pinouts
Gerber Files
I have decided to post the Gerber files for the Boeing 737 MCP as well as all downloadable files on this separate site. For all the time I have been working on it, I will be charging a small amount of money for the files, the prices you will find on that Downloads site ( I didn't do all this work for money but money is still needed to buy all the components and all this work is time consuming ). Only for personal use, if you want to use it commercially you need to contact me first.
In the "Downloads" page you will find the gerber files of the Boeing 737 MCP to produce the PCB. I haven't built the MCP myself, but it should be easy to build it. Basically the same principle as the Cessna 172 Radiostack. You need an Arduino to program with Mobiflight and connect it to the board. The parts are listed in the parts_list.xlsx file below together with the links. I have etched the the Cessna 172 PCB's at jlcpcb.com and have had great service. I'm not in any way affiliated with the company so the choice is yours where to print them.
In the "Downloads" page you will find the gerber files of the Boeing 737 MCP to produce the PCB. I haven't built the MCP myself, but it should be easy to build it. Basically the same principle as the Cessna 172 Radiostack. You need an Arduino to program with Mobiflight and connect it to the board. The parts are listed in the parts_list.xlsx file below together with the links. I have etched the the Cessna 172 PCB's at jlcpcb.com and have had great service. I'm not in any way affiliated with the company so the choice is yours where to print them.
2015, Copyright AlbEAGLE
